Application for Web-IO Analog-In:
Measured value meter (volts)
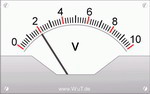
The value measured by the Web-IO Analog can be simply visualized on a Web page using JavaScript and a few images. Incorporation of the Web-IO applet provides for continuous updating of the display.
Using the following copy & paste example you can represent a current value measured by your Web-IO Analog on a Web page in the form of an analog meter. Corresponding sample Web pages and images can also be found for displaying an ampere value as well as displaying two measured values (volts and/or amps)
Preparations
You have already provided your Web-IO Analog
- with power,
- connected it to your network,
- assigned it an IP address - which with WuTility is no problem.
1. Incorporate JavaScript into the Web page
Copy the JavaScript (shown in blue) from the following example into the <head> area of your Web page.
<html>
	<head>
		<title>Zeiger</title>
		<script language="JavaScript" type="text/javascript">
		<!--
			var voltmeter = new multipic(101,"volt_400_","gif",20,10,10,"showvolt");
			var valuevolt;
			function multipic(id, img_name, img_ext, img_count, ypos, xpos, link)
				{
				img_count++;
				this.multipics = new Array( img_count );
				this.multipic_count = img_count;
				this.multipic_id = id; // class variables
				for (i=0; i<img_count; i++)
					{
					this.multipics[i] = new Image();
					this.multipics[i].src = img_name+i+’.’+img_ext;
					}
				this.Set = picSet; // class method
				if (link == "nolink")
					{
					document.write("<img id=’"+this.multipic_id+"’ style=position:absolute;top:"+ypos+"px;left:"+xpos+"px src="+this.multipics[0].src+" border=0>");
					}
				else
					{
					document.write("<a href=’javascript:" + link + "(" + id + ");’><img id=’"+this.multipic_id+"’ style=position:absolute;top:"+ypos+"px;left:"+xpos+"px src="+this.multipics[0].src+" border=0></a>");
					}
				}
			function picSet(iCount)
				{
				for (i=0; i<this.multipic_count; i++)
					{
					if(iCount==i)
						{
						document.getElementById(this.multipic_id).src = this.multipics[i].src;
						}
					}
				}
			function showvolt()
				{
				alert("Aktueller Wert: "+valuevolt+"V");
				}
			function sensorChanged( iDevice, iSensor, iVal )
				{
				if (iSensor==1)
					{
					valuevolt = iVal;
					voltmeter.Set(Math.round(iVal*2));
					}
				}
		</script>
	</head>
...
2. Incorporate applet into Web page
- Copy the applet data (in blue) to the <body> area of your Web page.
- Insert the IP address of your Web-IO Analog.
...
<body>
	<applet name="Analog" archive="A.jar" code="A.class" codebase="http://10.40.22.27" height="0" width="0" mayscript>
		<param name="device" value="0">
		<param name="showerrors" value="off">
		<param name="sensorpolling" value="on">
		<param name="pollingrate" value="500">
		Java ist nicht aktiviert oder wird nicht unterstützt
	</applet>
</body>
</html>
3. Download and store images
Now all you need is the images associated with the display object, which we have provided here for downloading: .zip (approx. 286 kB). Please place the images in the directory in which the Web page with the JavaScript and applet data are located.