Application for rule.box:
The rule.box as a door control
Visualize doorbells and actuate door openers

You activate the video function using the following button, whereby you use the provider Google and (at your own risk in terms of data protection ;) share data with it.
In this application we would like to show you how to configure the rule.box as a door control for doors, gates or barriers. Take a look at the video here or read the guide at the bottom of this page where we explain step-by-step how to create the visual representation of an acoustic signal and then a method for opening a door remotely.
What you’ll need:
- A W&T rule.box Digital
- Doorbell and door with electric opener
No problem: We will be glad to provide you with a rule.box for 30 days at no charge. Simply fill out the sample order and we will send the rule.box for testing on open account. If you return the device within 30 days we will fully credit the invoice.
To sample ordersWhat’s explained:

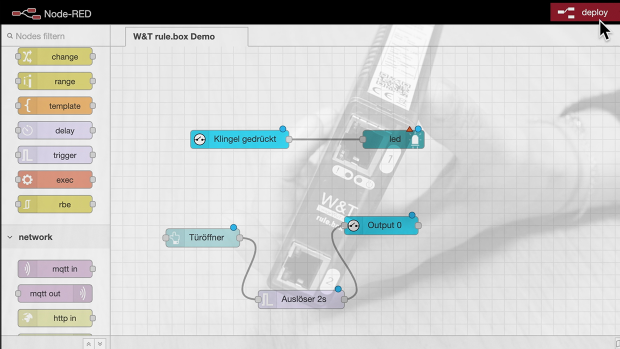
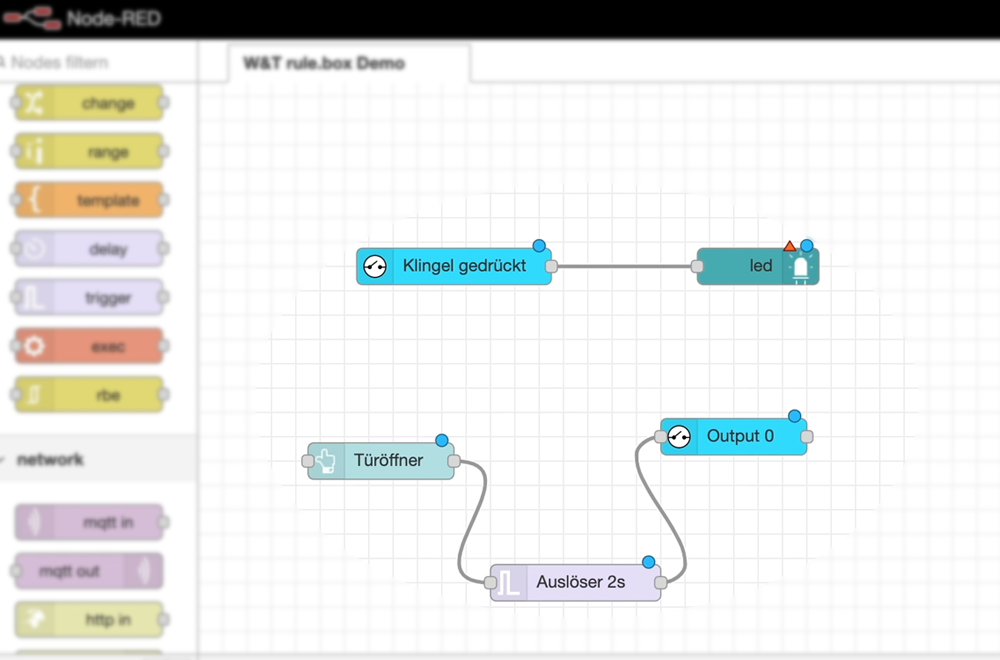
1. Creating a visualization for the doorbell
-
Open the Node-RED Editor. Get there using the corresponding link on the overview page of your rule.box in the browser.
-
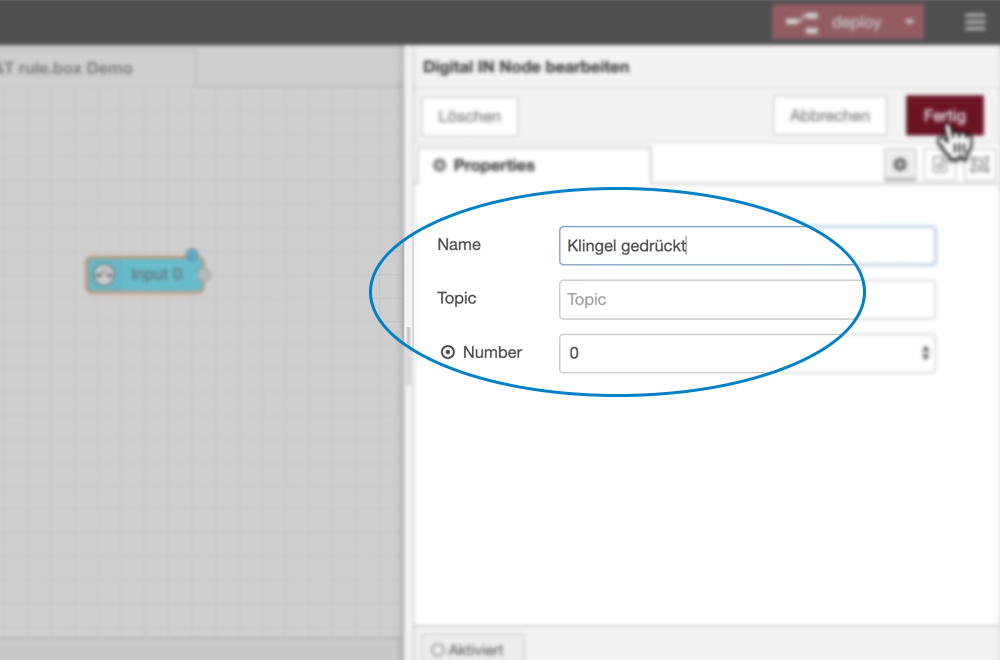
Drag the "Digital IN" node to your workspace.
-
Double-click on the node to open the corresponding configuration window. Enter a name for the node, e.g. "Doorbell pressed", and choose whether to monitor Input 0 or Input 1.
-
Install the LED node "node-red-contrib-ui-led" by clicking in the menu on Manage pallet and searching for "led" under the "Install" tab.
-
Then drag the "led" node from the node list to your flow and link it to the "Digital IN" node.
On the dashboard the virtual LED now tells you whether the contact was closed.
2. Setting up a door opener
-
Drag the "Digital OUT" node to your workspace. In the configuration specify whether Output 0 or 1 should be switched.
-
Now add the "button" node to your flow. In Properties under "Label" give it a label such as "Door opener" and as payload specify "ON".
-
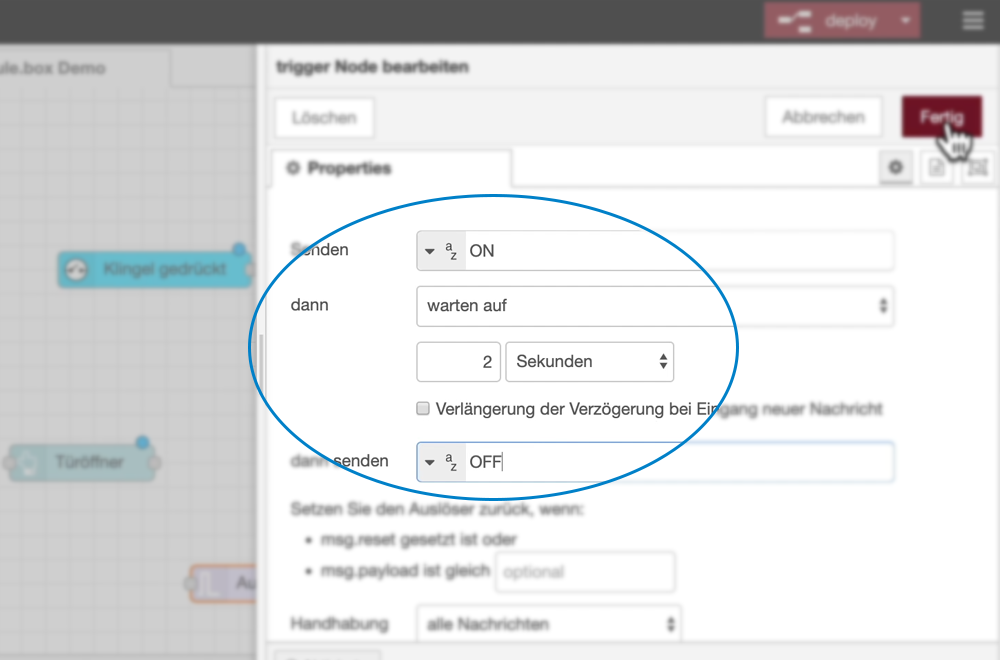
To ensure that the door opener is automatically turned off after a certain amount of time, drag the "trigger" node from the node list. Configure the node so that when triggered an "ON" and for example after 2 seconds an "OFF" is sent to the Digital OUT node.
-
Now link the button to the trigger and the trigger to the Digital OUT.
-
After clicking on deploy your door controller is ready to use.