iCloud calendar controls
Web-IO Time Switch
Manage switching times in the iCloud calendar

The Web-IO 4.0 Time Switch can time the switching of four switching outputs according to calendar files in iCal format (*.ics). One way to provide the corresponding iCal files is to use the online calendar of an iCloud account.
This application example shows what steps are needed for the switching outputs on the Web-IO Time Switch to follow the date entries in an iCloud calendar.
Step 1 - Connect Web-IO Time Switch
Wiring
To operate the Web-IO Time Switch a supply voltage of between 12V and 24V DC or a corresponding power supply is required.
The connected supply voltage is switched to the corresponding output terminal in the ON state.
If a potential-free contact is required for controlling the consumer, a coupling relay can be added.
Wiring of the Web-IO Time Switch should be performed only by trained personnel.

For Output 0 for example to Terminal 4, with the associated ground on Terminal 5.
Network
The Web-IO Time Switch must be connected to an available LAN terminal.

Step 2 - Configure network
The Web-IO Time Switch should always have a static IP address assigned. For this purpose, most routers offer the possibility to exclude an IP address range from the DHCP address assignment.
Assign IP address using WuTility
Now on a Windows PC start the WuTility tool

Click on the IP address icon to start the dialog for IP address assignment. Enter here the desired IP address and click on the Continue button.
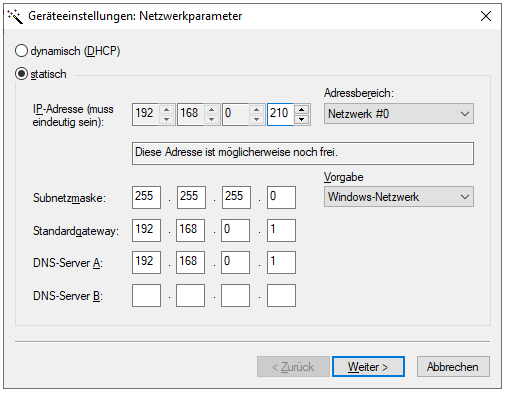
The Web-IO Time Switch can now be reached at the assigned address.
Step 3 - Set up iCloud calendar
The following description presumes that you already have an iCloud account.
Creating a calendar
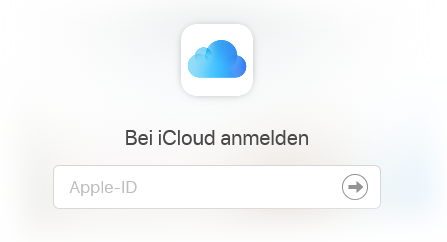
First use your Apple ID to log in to https://www.icloud.com.
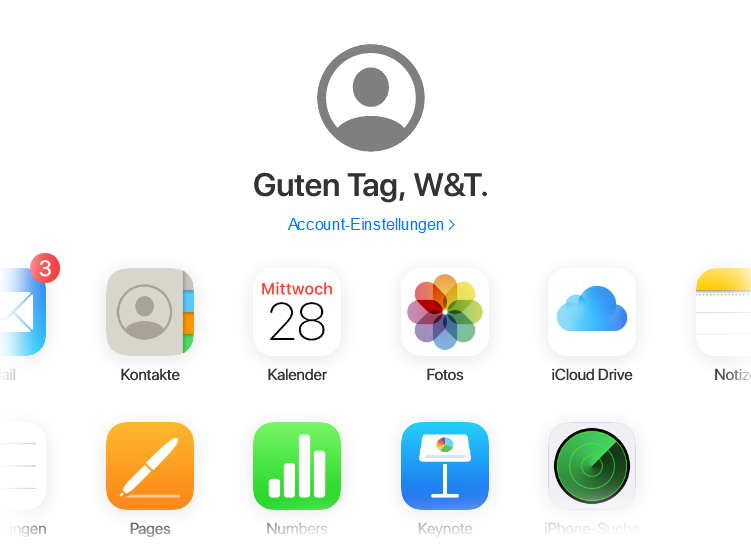
After successful login to your iCloud account, go to the application menu and select Calendar.
The calendar view opens. Left-click below on Edit and then on the "+" symbol at lower left to create a new calendar.
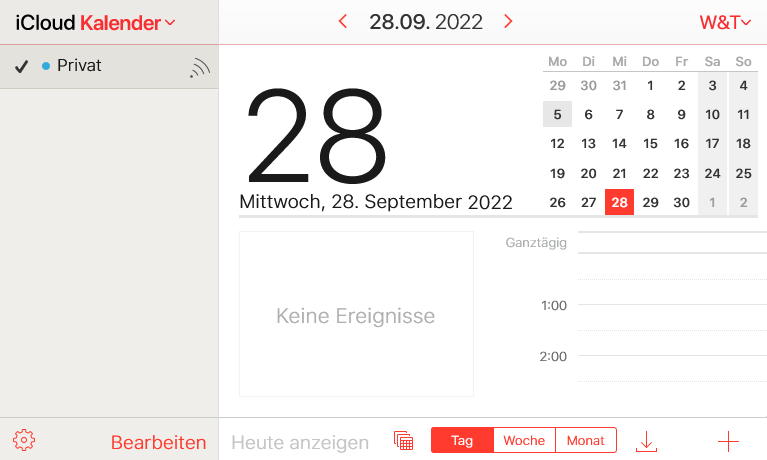
Assign a meaningful name to the calendar.
Creating a switching date
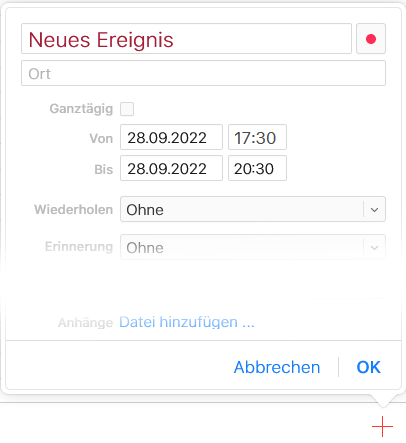
To add a new switching date, first highlight the newly created calendar. Clicking on the "+" symbol at lower right opens a dialog in which a new event or switching date can be created. You may determine the time within which the output of the Web-IO should be turned on. You can also specify whether and when there should be a following date. Then confirm by clicking on OK to add the date to the calendar.
Copying a calendar address
After you have saved the new date, click on the "Share" logo next to the calendar name. This opens the calendar release dialog. Here set the option Public calendar and copy the link for the calendar URL to the clipboard. Then confirm by clicking on OK.
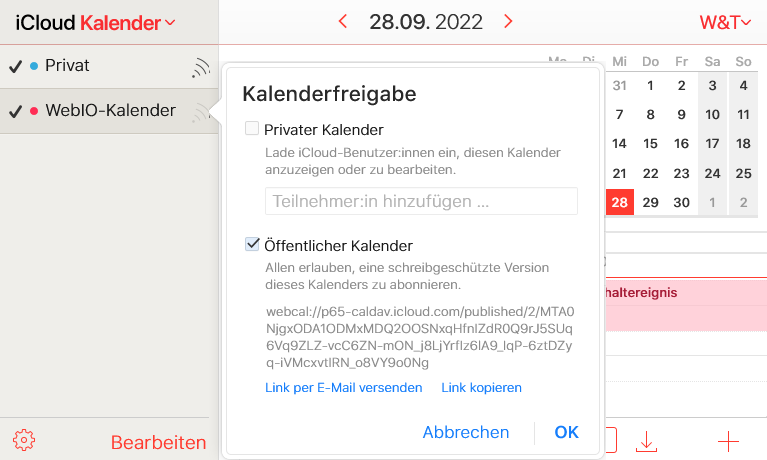
In the next step you must insert the address (URL) into the Web-IO configuration.
Step 4 - Configure the Web-IO Time Switch
Set up output for timed switching
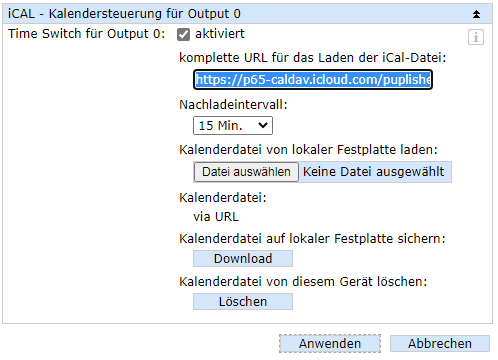
Log in to the web interface of the Web-IO Time Switch as Administrator and select menu point Timed switching >> Output 0.
Enable Time Switch for Output 0. Insert the copied calendar URL into the field complete URL for loading the iCal file. In the inserted URL replace webcal with https. Use Reload interval to specify at what interval to reopen the calendar file from the server and check for changes.
Clicking on the Apply button saves the settings and starts the first opening of the iCal file.
In this way each output can have its own URL and own independent calendar configured for it.
Check switching times
As soon as the Web-IO Time Switch has successful loaded an iCal file, you can use menu point Timed switching >> Preview switching times to list the next switching events.

The outputs now follow the switching dates stored in the respective calendar.